8/22/2024
A Complete Guide to Setting Up a ChatGPT Account
Welcome, future ChatGPT user! If you're ready to dive into the world of conversational AI, you're in luck. This guide will give you an easy-to-follow steps to set up your ChatGPT account in no time. We'll cover all the essentials, from navigating the website to configuring your account and even testing the AI. Let’s get started!
Step 1: Navigating the ChatGPT Website
First things first, head on over to the ChatGPT login page. Here you’ll find all the details to kick off your account setup.

ChatGPT login page.
Step 2: Starting the Signup Process
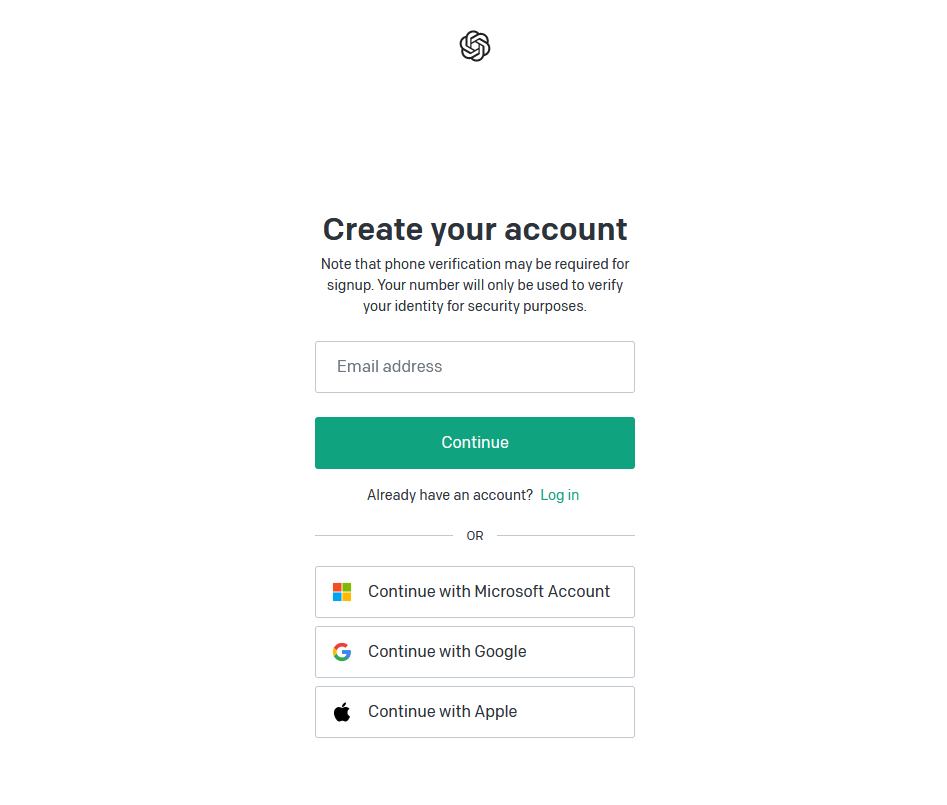
Once you're on the homepage, look for the “Sign Up” button. Clicking that will redirect you to the “Create an account” page where you will be prompted to enter your email address and create a strong password. Alternatively, you can use your existing Microsoft, Google, or Apple accounts for added convenience, skipping some steps in this process.
 Create account page.
You enter your email address in the text box, and then click the Continue button.
Next, the password field appears; use a password that is both secure and strong, ideally, something you haven't used elsewhere. Afterward, hit the Continued button to proceed.
> Security Tip: Make sure to create a password with at least 15-20 characters, and include at least two uppercase letters, two lowercase letters, two special characters, and two numbers to keep your account safe.
Step 3: Email Verification
After filling out the signup form, check your email inbox for a verification email from OpenAI. Click the link in the email to verify your account, and this will redirect you back to the ChatGPT website to confirm your email.

Email verification message.
Step 4: Account Configuration
Now that your email is verified, it's time to configure your account. Locate the account tile in the bottom left corner of the ChatGPT web app and click the three-dot icon. This will bring up the menu options.

Account menu.
Select “Custom Instructions” to set details that you want to apply to every session. You can provide information about your location, work preferences, hobbies, and even your preferred response style—say, a more casual tone.
Alternatively, you can find more configuration tasks under the “Settings & Beta” menu. This includes choices for UI themes, beta features, and controls for your data.

Settings menu.
Step 5: Subscription Plans (Optional)
While the ChatGPT service powered by the GPT-3.5 model is available for free use, OpenAI does offer subscription plan for accessing GPT-4 with extra features. Depending on your needs, you can browse through the available plans and choose the one that best suits you. To check the pricing, visit OpenAI's Enterprise page.
Step 6: Testing ChatGPT
With your account all set up, you’ll be brought to the ChatGPT interface. You can begin testing the AI by typing a message into the input box typically found at the bottom of the interface.

Example prompt ChatGPT.
After entering your message, simply press “Enter” and wait for ChatGPT to respond.

ChatGPT's response.
Conclusion
And that’s it! You've successfully set up your ChatGPT account. Now you can explore all kinds of tasks—be it answering queries, assisting with writing, or even engaging in fun conversations.
In this guide, we've gone through:
In this guide, we've gone through:
- Navigating the ChatGPT website
- Starting the signup process
- Email verification
- Account configuration
- Subscription plans (optional)
- Testing ChatGPT
If you encounter any issues or have further questions, the FAQ section and customer support are great resources. Happy chatting!
> For additional insights into ChatGPT or generative AI, check out more AI Articles on Codecademy.
> For additional insights into ChatGPT or generative AI, check out more AI Articles on Codecademy.
About the Author
The Codecademy Team consists of experienced educators and tech experts, devoted to making technology skills accessible for everyone. They empower learners worldwide with expert-reviewed content that develops and enhances the technical skills needed for success in their careers. Meet the full team.